Never Say Goodbye To Cake…

Never Say Goodbye To Cake…

I have pondered and thought about whether I should write this for some time…

Me-Sawmill Cafe

When I began this blog, I never had any idea what direction it would go in, but I just found the whole cake / bake phenomenon so interesting (and yummy), and I could always appreciate a good cake! My love of cake stemmed from childhood, but my true joy of baking has really come into play in my adult years. So I began this blog to chart my cake journey chronicles, and it has opened my eyes and mind to more than I ever expected.

say-it-with-cake-image

However instead of my enthusiasm and interest in cakes dwindling – it has only got bigger, and my desire to get better at baking has only increased. So now I’m at a stage where there is so much going on life-wise and cake-wise, and whilst I would like to continue writing this blog, I’m very aware that I lack the hours and energy to maintain an up to date record of all my cake delights and findings. So I’m going to continue my cake quest through other social media: instagram (@Reas_Bakes) and Facebook (Rea’s Bakes facebook page).

Reas Bakes Final - PNG

Thank you for reading my ramblings over the years, and I hope you have enjoyed seeing samples of my cake escapades!

Love & Eat Cake!

Strawberries & Basil Cake

Strawberries & Basil Cake

With the last of the summer holidays on the horizon, I wanted to  add the recipe for the Strawberries and Basil cake that I made for the recent Cake Club. Everyone was taken by the flavour combination and pretty colours!

Strawberries & Basil Cake

Strawberries & Basil Cake Recipe

Ingredients:

  • 200g butter
  • 200g caster sugar
  • 4 eggs
  • 1 teaspoon vanilla extract
  • 200g plain flour
  • 1 teaspoon baking powder
  • 50g olive oil
  • 25g fresh basil
  • green colour paste (optional)
  • 100g strawberry jam
  • 150g vanilla frosting
  • fondant icing (to cover) or you could use vanilla frosting

Method:

  1. Preheat the oven to 170 C / Gas 3. Grease a 6″ cake tin.Strawberries & Basil Cake - batter
  2. Blend the basil leaves with the olive oil until you  have a paste consistency.
  3. In a large bowl, mix the butter and sugar until light and fluffy
  4. Add the eggs one at a time and vanilla extract to the butter mixture.
  5. Add the flour, baking powder and basil paste – fold together gently.
  6. If you would like the cake to have a stronger “green” colour then add the paste at this stage and mix thoroughly into the batter.
  7. Pour into the prepared cake tin.
  8. Bake for 30 to 40 minutes. Remove from the oven and cool before icing.
  9. Divide your cake into 2 or 3, layer and stack with vanilla frosting and jam then cover with fondant icing or vanilla frosting.

Birthday Cake Challenge: Ferrero Rocher Cake & New Name!

Birthday Cake Challenge: Ferrero Rocher Cake & New Name!

It was my lovely Sister In-Law’s birthday this weekend, so I put on my apron, got out my baking tins and had fun with her favourite chocolate!

Ferrero Rocher Cake

I created a chocolate and hazelnut cake complete with Ferrero Rochers (of course) 😉 She has assured me that it tastes of “pure indulgence” – so it was a success. Here’s the recipe for those that want to sample the same indulgence. This cake also fits in nicely with the blog’s new and improved name…“Say It With Cakes”!

Ferrero Rocher Cake Recipe

Ingredients:

  • 200g butter
  • 200g caster sugar
  • 3 eggs
  • 1 teaspoon vanilla extract
  • 150g plain flour
  • 50g cocoa powder
  • 1 teaspoon baking powder
  • 75g crushed hazelnuts (plus more to decorate)
  • chocolate frosting
  • 1 box of 16 x ferrero rochers                                                                 Ferrero Rocher Cake Mixture

Method:

  1. Preheat the oven to 170 C / Gas 3. Grease a 6″ cake tin
  2. In a large bowl, mix the butter and sugar until light and fluffy.
  3. Add the eggs one at a time and vanilla extract to the butter mixture.
  4. Add the flour, cocoa and baking powder .
  5. Fold in the crushed hazelnuts.
  6. Pour into the prepared cake tin.
  7. Bake for 30 to 45 minutes. Remove from the oven and cool before icing and decorating with ferrero rochers and hazelnuts. Enjoy!

Cake Club: A Slice Of Summer & More!

Cake Club: A Slice Of Summer & More!

The summer sun has arrived and before the Cake Club took it’s annual summer break, we indulged in an afternoon of cakes (yay!)

Cake Club - Tracy Spread

Following my latest cake decorating class, I wanted to practice my new icing skills and practice it certainly was! I also wanted to bake a new and different flavour cake and after some summery thoughts, I decided I wanted to incorporate strawberries. This lead me to think about what went well with strawberries…and basil sprung to mind! Strawberries and basil cake it would be (recipe to follow in a separate post I promise)!

Strawberries & Basil Cake

Everyone made a terrific effort in their cake ideas, and as well as my strawberries and basil cake there was a choice of chocolate ganache cake, coconut cake, disaronno cheesecake, cupcakes and scones (with jam and clotted cream). We all enjoyed the offerings and I think everyone likes the idea of not knowing what will be on offer at each (home) Cake Club.

Cake Club - Tracy

Once again we weren’t without topics of conversation and as the next Cake Club won’t be until the Autumn there will be a lot to discuss by October 😉

Cake Club: Cheesecake Battles!

Cake Club: Cheesecake Battles!

Okay so I’m a week late, but it doesn’t change what a delightful Cake Club it was…

Cake Club - Louise (2)

Once again the spread was plentiful and appetising. Everyone made an effort to bring something different and decadent to the table. This time I decided to opt for a cheesecake! So I thought a Chocolate and Baileys cheesecake (far right) would be well received by the ladies – recipe to follow in another post! It was one of the easiest cheesecakes to make and was very tasty – a definite crowd pleaser. However I wasn’t the only person to bring a cheesecake along – novice baker Tracy (her words not mine!) also delivered an Oreo Cookie cheesecake – which got just a lot of Mmmm’s.

Cake Club - Louise

There was also Carrot Cake, Banana Cake, Cherry and Almond cake, Lemon and Strawberry cake, Pineapple Cake and Banoffee tarts – the choice was again overwhelming, even for me! However the supreme winner this time was Tracy and her Oreo Cheesecake. I also kept my promise and delivered the last winner’s (Julie) chosen Malteaser cake. This time the prize for Tracy is that we’ll be treating her to a cake at our next “Restaurant” Cake Club. Well done Tracy – can’t wait to taste your next creation! 😉

Easter Mini Eggs Cake

Easter Mini Eggs Cake

Easter feels like weeks ago…

Easter Cake - unwrapped

As we were invited to a friend’s for dinner over the Easter period, I debated on whether we should take the usual bottle or some flowers etc. Then I thought why not bake a cake (in keeping with my home-baking theme!) And since it’s Easter – let the mini eggs roll!! I decided to make a golden syrup sponge with vanilla frosting. It turned out to be a favourite with the kiddies and was lovely with a cuppa! 🙂

Easter Cake - wrapped

Easter Mini Egg Recipe

Ingredients:

  • 150g butter
  • 150g caster sugar
  • 2 eggs
  • 1 teaspoon vanilla extract
  • 150g plain flour
  • 1 teaspoon baking powder
  • 200g golden syrup
  • vanilla frosting
  • 3 bags of mini eggs
  • 1 malteaser bunny

Method:

  1. Preheat the oven to 170 C / Gas 3. Grease a 6″ cake tin
  2. In a large bowl, mix the butter and sugar until light and fluffy.
  3. Add the eggs and vanilla extract to the butter mixture.
  4. Add the flour and baking powder and fold together gently.
  5. Add 150g of the golden syrup.
  6. Pour into the prepared cake tin and swirl in the remaining syrup.
  7. Bake for 30 to 40 minutes. Remove from the oven and cool before icing and decorating with mini eggs etc.

It was a lovely Easter and this cake was a winner!!

Cake News: Tenants Contracts Landlord To Give Them Birthday Cakes

Cake News: Tenants Contracts Landlord To Give Them Birthday Cakes

This is a very amusing news story  and it relates to cake…

Birthday Cake Image

The Mail Online reported this week that some imaginative tenants were sent a rental agreement contract to sign by their landlord – but instead of a locked PDF, the property-owner sent an editable Word document. In turn the opportunistic pair added an extra clause to the contract – the provision of birthday cakes on both of their respective birthdays – which the landlord then unwittingly signed.

The tenants even stipulated that the birthday cakes must not be vanilla flavour – haha!

See a copy of the contract here that has spread like wild-fire online.

It’s a reminder to us all that we should read anything before we sign it. Let’s hope that the landlord knows a good baker!

Mother’s Day Special: Milk Tray Cake

Mother’s Day Special: Milk Tray Cake

Who doesn’t love the idea curling up with some yummy chocolates…

Milk Tray Cake

As Mother’s Day was approaching I wanted to create a “wow” cake for my lovely Mum. My first thoughts were chocolates and but I didn’t want it to be just any ordinary chocolate cake. After some thought and research I decided that this indulgent cake should have as many chocolates as I could possibly fit on it!

Milk Tray Cake Boxed

I opted for a nutella sponge which gave the cake a slight hazelnut flavour and the chocolate buttons supported my mission of “chocolate overload”.  

She was surprised and delighted by the Milk Tray chocolate cake!

Lazy, Hazy, Crazy Days Of Summer

Lazy, Hazy, Crazy Days Of Summer

I can’t believe it’s been nearly 2 months since I last posted anything on here…

Amsterdam pics

With trips away and the sunny days getting me slightly excited, the days and weeks have felt like a hazy blur!

Having my first mini-break away in 4 years to Amsterdam was a major highlight (see above). Among the many great moments of the trip, I sampled some of the best fish I have EVER tasted, and took a trip to the infamous Ice Bar (yes it was extremely cold!) Although I wasn’t wowed by any desserts on the trip, I have had my fair share of sweet offerings this summer…

Amsterdam Cakes Pic

My other big trip this summer was a family and friends stay-cation to an beautiful cottage. Once again I wasn’t short of treats, and I even baked everyone a Salted Caramel cake (recipe to follow later). Although we had some very wet (and dreary) days over the last few weeks, we also had some amazing sunny days too – where the only right thing to do was to get the BBQ out and enjoy the rays! Happy days!!! 🙂

Cottage Pic

Cookies & Cream Brownies – Recipe

Cookies & Cream Brownies – Recipe

This recipe is a hit with any oreo cookie lover…!

Cookies & Cream Brownies

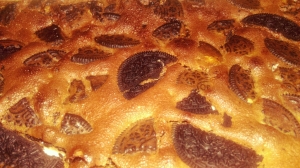
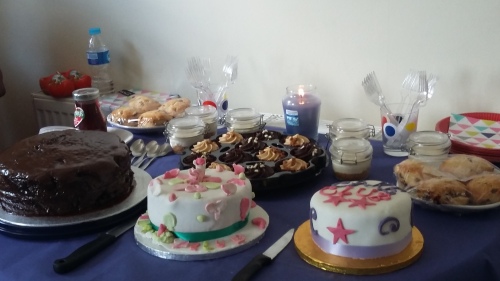
I recently needed a “quick” brownies recipe, and rather than sticking to my tried and trusted Hummingbird Bakery recipe, I turned to another favourite chef – Lorraine Pascale. The idea of the oreo cookies submerged in this chocolate moistness seemed ideal! Although in reality this recipe wasn’t much quicker, it did still please the hungry brownies crowd, and made a nice change with it’s slight twist! 

Cookies & Cream Brownies - slices

Ingredients
165g/5½oz butter, plus extra for greasing
200g/7oz dark chocolate, grated or finely chopped
3 free-range eggs
2 free-range egg yolks
1 vanilla pod, seeds only (or alternatively 2 tsp vanilla extract)
165g/5½ oz soft light brown sugar
2 tbsp plain flour
1 tbsp cocoa powder
pinch salt
154g/5½oz pack chocolate biscuits, such as Oreos, broken into quarters
icing sugar, for dusting

Equipment
You will need a 20cm/8in square baking tin.

Preparation method
Preheat the oven to 180C/350F/Gas 4. Grease a 20cm/8in square baking tin with butter, then line with baking paper with the paper overlapping the sides a little.

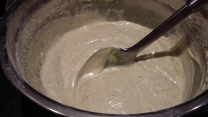
Melt the butter in a pan over a medium heat. When the butter has melted, remove the pan from the heat and add the grated (or chopped) chocolate. Leave to stand for a few minutes, or until the chocolate melts, and then stir together. Alternatively, you can put the chocolate and butter in a bowl and melt in the microwave in 25-second blasts, stirring well each time.

Whisk the eggs, egg yolks and vanilla together in a large bowl until the eggs begin to get light and fluffy. Add the sugar in two additions, whisking between each. Pour it around the side of the egg mix so as not to knock out the air that has been whisked in. Keep whisking until the mixture becomes stiffer. Once the egg mixture is ready, pour the chocolate into it – again around the sides so as not to knock the air out.

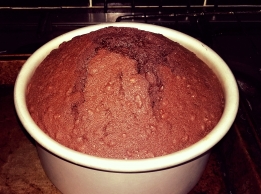
Add the flour, cocoa powder, salt and a third of the biscuits and stir until fully combined, then pour the mixture into the prepared tin. Scatter the remaining biscuits over the top, pressing them in slightly. Bake on the middle shelf of the oven for 25–30 minutes. The middle should be very so slightly gooey. Leave the brownies to cool in the tin – the top will sink and crack a little.

Pull the brownies out using the overlapping paper and cut into squares. Dust with icing sugar.